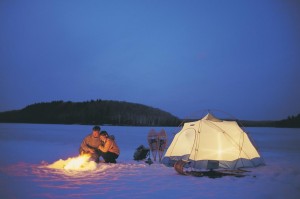
How to Prepare for Hiking Around Chilliwack

Get out and see more nature while camping around Chilliwack. For hikes in the mountains around Chilliwack (or elsewhere), you should bring the following basic gear:

  • Water bottle
  • Water purification equipment or iodine drops
  • First aid kit
  • Blister kit may be part of the first aid kit):
    • Mole skin
    • Bandages
    • Needle or pin
    • Lighter
    • Antibiotic ointment
    • Antiseptic wipes
  • Extra socks (here is why)
  • Extra shoe/boot laces – not just for shoes, many uses
  • Flashlight or other light source – in case you are delayed beyond dark
  • Compass or phone or GPRs with compass
  • Map of the area and info sheet about the trail you are using
  • Knife (multiple uses)
  • Rope (multiple uses)
  • Trail mix for snacking Carry your trail mix where it is easily available for snacking as you walk.
  • Day pack to hold it all

For longer hikes you are going to want to eat. Select foods that are low-weight (less to carry), high calorie/energy, and that either need no or little preparation. If you plan to cook bring your backpacking stove and mess kit.

Remember to bring a plastic bag and pack out any trash you generate or find. Leave the trail better than you found it so that the next people can enjoy the trail as well.

Posted in Outdoor Sports near Chilliwack | Comments Off on How to Prepare for Hiking Around Chilliwack

Foot Care Outdoors

Explain the importance and method of proper foot care with regard to cleanliness, care of nails, socks, shoe selection, and first aid of tender or blistered feet.

Proper Footwear

The most important aspect of proper foot care for hiking is to have proper footwear.

Experts recommend wearing two pairs of socks on a hike: a thin pair next to your skin, and a thick, padded pair over the thin pair. Two pairs of socks mean the socks will rub against one another instead of rubbing against your feet, saving you from blisters.

When shopping for hiking boots or shoes, put on the type of socks you will wear when you hike. With two pairs of socks on you may need shoes or books just little larger than your normal shoe size to accommodate the extra sock thickness.

Hiking shoes should have good ankle support and should lace up tightly. Look for good tread on the soles and sturdy construction. You break new boats in around town for a few days before you hit the trails. before pressing them into service on a hike. New shoes can cause blistering and you do not want that on the trails.

Dry Feet

Throw extra socks in your pack so that you can change them if they get wet. Hiking in wet feet softens the skin and leads to blisters, fungus growth and immersion foot. Yuck and Ouch!

Immersion foot is a condition caused by cold and damp feet constricted by wet foodwear. Unlike frostbite, immersion foot does not require freezing temperatures and can occur in temperatures up to 60° Fahrenheit (about 16° Celsius). Immersion foot needs as little as twelve hours’ exposure to develop. You will notice affected feet become numb and then turn red or blue followed by swelling. Advanced immersion foot often involves blisters and open sores, which lead to fungal infections – sometimes called jungle rot. If left untreated (don’t let it go untreated) immersion foot usually results in gangrene, which can require amputation. If immersion foot is treated properly, complete recovery is normal, though it is marked by severe short-term pain when feeling is returning. Like other cold injuries, immersion foot survivors remain more susceptible to the condition in the future.

Avoid all this unpleasantness by keeping your feet warm and dry. Changing socks frequently if your feet cannot be kept dry for whatever reason.

Nail Care

Before you set out on a hike, check that your toenails for proper trimming. Trim straight across so that they do not hang over the toe edge. Cutting toenails too short or in a curved shape can cause them to become ingrown, potentially leading to infection and extreme discomfort.

Toenails that are left too long are susceptible to breaking off. Also, long toenails will wear your socks out more quickly.

Blisters

Blisters on the feet and toes are caused by something repeatedly rubbing on them, such as a sock or an ill-fitting shoe. As soon as you detect soreness, you should stop and examine the foot. Reddened skin is the first sign that a blister is potentially forming. Covering the affected area with an adhesive bandage or even a small strip of duct tape will help prevent a blister from forming. If possible, cover the area with a donut-shaped moleskin before covering with a bandage. This will help alleviate pressure on the area.

If the blister has already formed, do not puncture it. Leave the skin covering the blister as intact as possible, as it provides a sterile environment underneath. If the blister is on a weight-bearing surface on the bottom of the foot and you must puncture it, use a sterile needle, and make as few punctures as possible – just enough to drain the liquid. Do not peel any skin off the blister. You can sterilize a needle or a pin by passing it through a flame.

Wash the affected area as well as you can using purified water or a sterile wipe. Again, cover the blister with a donut-shaped moleskin, apply some antibiotic ointment, and cover with a bandage. This is a great reason for a proper first aid kit.

Blister Kit (can be part of your First Aid Kit)

  • Mole skin
  • Bandages
  • Needle or pin (for popping if required)
  • Lighter
  • Antibiotic ointment
  • Antiseptic wipes

Posted in Camping & RVing, Emergencies | Comments Off on Foot Care Outdoors

Prepare Before Adventure Around Chilliwack

There is limitless wilderness activities to enjoy around Chilliwack, but the best way to enjoy them is by being prepared and safe.

Chilliwack SAR and Kent Harrison Search and Rescue sees too many people caught outdoors unprepared for an emergency, getting lost,  or even stranded in the winter in the wilderness.  Here are some tips from the great volunteer crew at Kent Harrison Search and Rescue.

  • Be prepared for the activity that you are undertaking – that means having the knowledge, training, physical ability, equipment & planning for the activity before you go.
  • Make a Trip Plan and Leave it with a responsible person. Here is a super helpful form to fill in.
  • Observe the 10 Essentials:
  1. Flashlight, spare batteries and bulb
  2. Firemaking kit – waterproof matches/lighter, firestarter/candle
  3. Signalling device – whistle or mirror to signal searchers if you become lost
  4. Extra food and water or water treatment – 1 litre/person
  5. Extra clothing (rain, wind, water protection and toque). It tends to rain around Chilliwack
  6. Navigational/ Communication Aids (maps, compass, GPS, charts, cellular phone, satellite phone, hand held radio – fully charged battery and a spare!) – know how to use them
  7. First Aid kit – know how to use your first aid kit – get trained
  8. Emergency shelter – orange tarp or large orange garbage bag. These can also be used as signalling devices – and SAR recommends Orange because it is very visable
  9. Pocket knife
  10. Sun protection (glasses, sunscreen, hat)

bridal-falls

. . . . .   SAR also says to OBEY WARNING SIGNS!

Don’t just store your RV in Chilliwack, get outdoors and use it too.

Posted in Camping & RVing, Emergencies, Outdoor Sports near Chilliwack | Tagged , , , , | Comments Off on Prepare Before Adventure Around Chilliwack

Winter Camping Gear Checklist and Camp Setup Plan

Clothing

  • Several thin layers of synthetic clothing.
  • Wind-proof shell, such as a parka.
  • Thin, synthetic socks with thick, wool socks over them.
  • Waterproof boots, such as Mukluks, or rubber boots. Avoid steel-toed or leather boots.
  • Gaiters to keep snow out of your boots.
  • Wind-proof mittens over wool gloves.
  • Wind-proof pants over wool or fleece pants. Do not wear jeans – cotton kills.
  • Down-filled vest.
  • Warm headgear. Your body loses most of its heat through the head, so keep it insulated!

Gear

  • Sleeping bag, rated for the expected temperatures
  • Sleeping mat made of closed cell foam will protect the camper from the cold ground. It should be considered essential for cold weather. They roll up about 6 inch diameter.
  • Compass, map, and flashlight. It is illegal to venture into some areas without these essential items!
  • Knife
  • Personal toiletries
  • First aid kit
  • Small tents are easier to heat than large ones (and your body is the furnace) or you might build a snow cave.
  • Sled, snowshoes, or cross-country skis.
  • Rope
  • Camping stove – make sure your stove will work in cold temperatures. Propane, butane, and alcohol stoves can be difficult (or impossible) to light at low temperatures. Wood-fueled camping stoves  are strongly advised.
  • Matches
  • Cooking gear and utensils.
  • Mess Kits (plate, cup, cutlery).
  • Whistle (one for each member of the expedition).
  • Water purification solution

Remember winter camping safety is even more important than in regular camping because the environment is more hostile.

Source

wintercamping

Pitching a tent in winter conditions can pose a problem as anchoring the tent to the ground is more difficult. Winter winds tend to be stronger than summer winds, so securely anchoring the tent is even more important. Meanwhile, the ground is frozen, making it difficult to drive stakes into it. Also the ground may be buried deep beneath the snow.

When pitching a tent in snow, first stomp down an area as large as the tent. Level the ground if necessary by shifting move snow from the high side to the low side, or add other snow to level things out (can’t do that in the summer). Pack and smooth things out as quickly as possible because fluffy mounds of snow have a strange way of turning into bumpy chunks of ice very quickly. Chunks of ice are not fun to sleep on.

Then lay the tent out. Anchor the tent before erecting the poles if there is any wind to avoid it blowing away. To anchor the tent in the snow if you can’t get stakes into the ground, fill a bag with snow, ice, or rocks, and tie it to the tent’s anchor point, and bury the bag in the snow. Then pack the snow down firmly around the bag. Be sure to dig up the bags when you break camp.  You can also consider anchoring to trees or heavy logs.

In deep snow, consider digging out a kitchen area and building up walls with the snow you scoop out of the kitchen hole to shelter your cooking and fire area. If you want to go further, dig a path from the kitchen to the tents, and build snow chairs and tables. These activities put you, your friends and your fire all below the snow and out of the wind.

Or, if you have a lot of time you could build something like this:

Posted in Camping & RVing | Tagged , | Comments Off on Winter Camping Gear Checklist and Camp Setup Plan